
Aight, this is a super-long post. I’ve tried to condense it down but turns out I ONLY HAVE ONE MORE POST AHEAD OF ME :0
This post breaks down the group projects I’ve worked on this year, along with the programs and tools I’ve used to aid my learning and collaboration. Feel free to have a skim through to see what you can get up to academically next year!
Table of Contents
- Group Projects this Year …………………………………………….. like a third of the way down
- Tools and Programs used this Year……………………………. maybe halfway?
- Personal Reflection of Group Work…………………………… last bit at the end
SECTION 1: GROUP PROJECTS IN PART 2
I like to think that Mechanical Engineering is THE specialisation which focusses on groupwork. That’s not to say the other specialisations don’t have group work, but it feels like the mechanical chads get a ton of experience in group projects.
Every single day of this academic year, I have been involved in a group project.
In fact, our first lecture of the year introduced the Warman Design Project.
Our last day of semester 2, we presented our bridge models to clients.
Needless to say, the mechanical cohort needs a summer locked in a room to recover from such strenuous social exercise.
I have learnt a lot about what separates a good team from a GREAT team, and since I think quite highly of myself, I’d like to share with you how group projects can actually be made extremely simple (and most importantly, FUN).
Before I get into that, here’s a quick recap of the group projects done in part 2 mechanical!
The projects we work on with others include:
- 235 Warman Design Project
- This is a six-week conceptual project done in teams of four.
- Basically, the University enters this prestigious robotics competition called the Warman Competition. The competition is about building an autonomous robot that performs a task on a competition track. The best universities in Australasia then battle it out to see who does the task fastest. In fact, UoA actually won the whole thing this year!
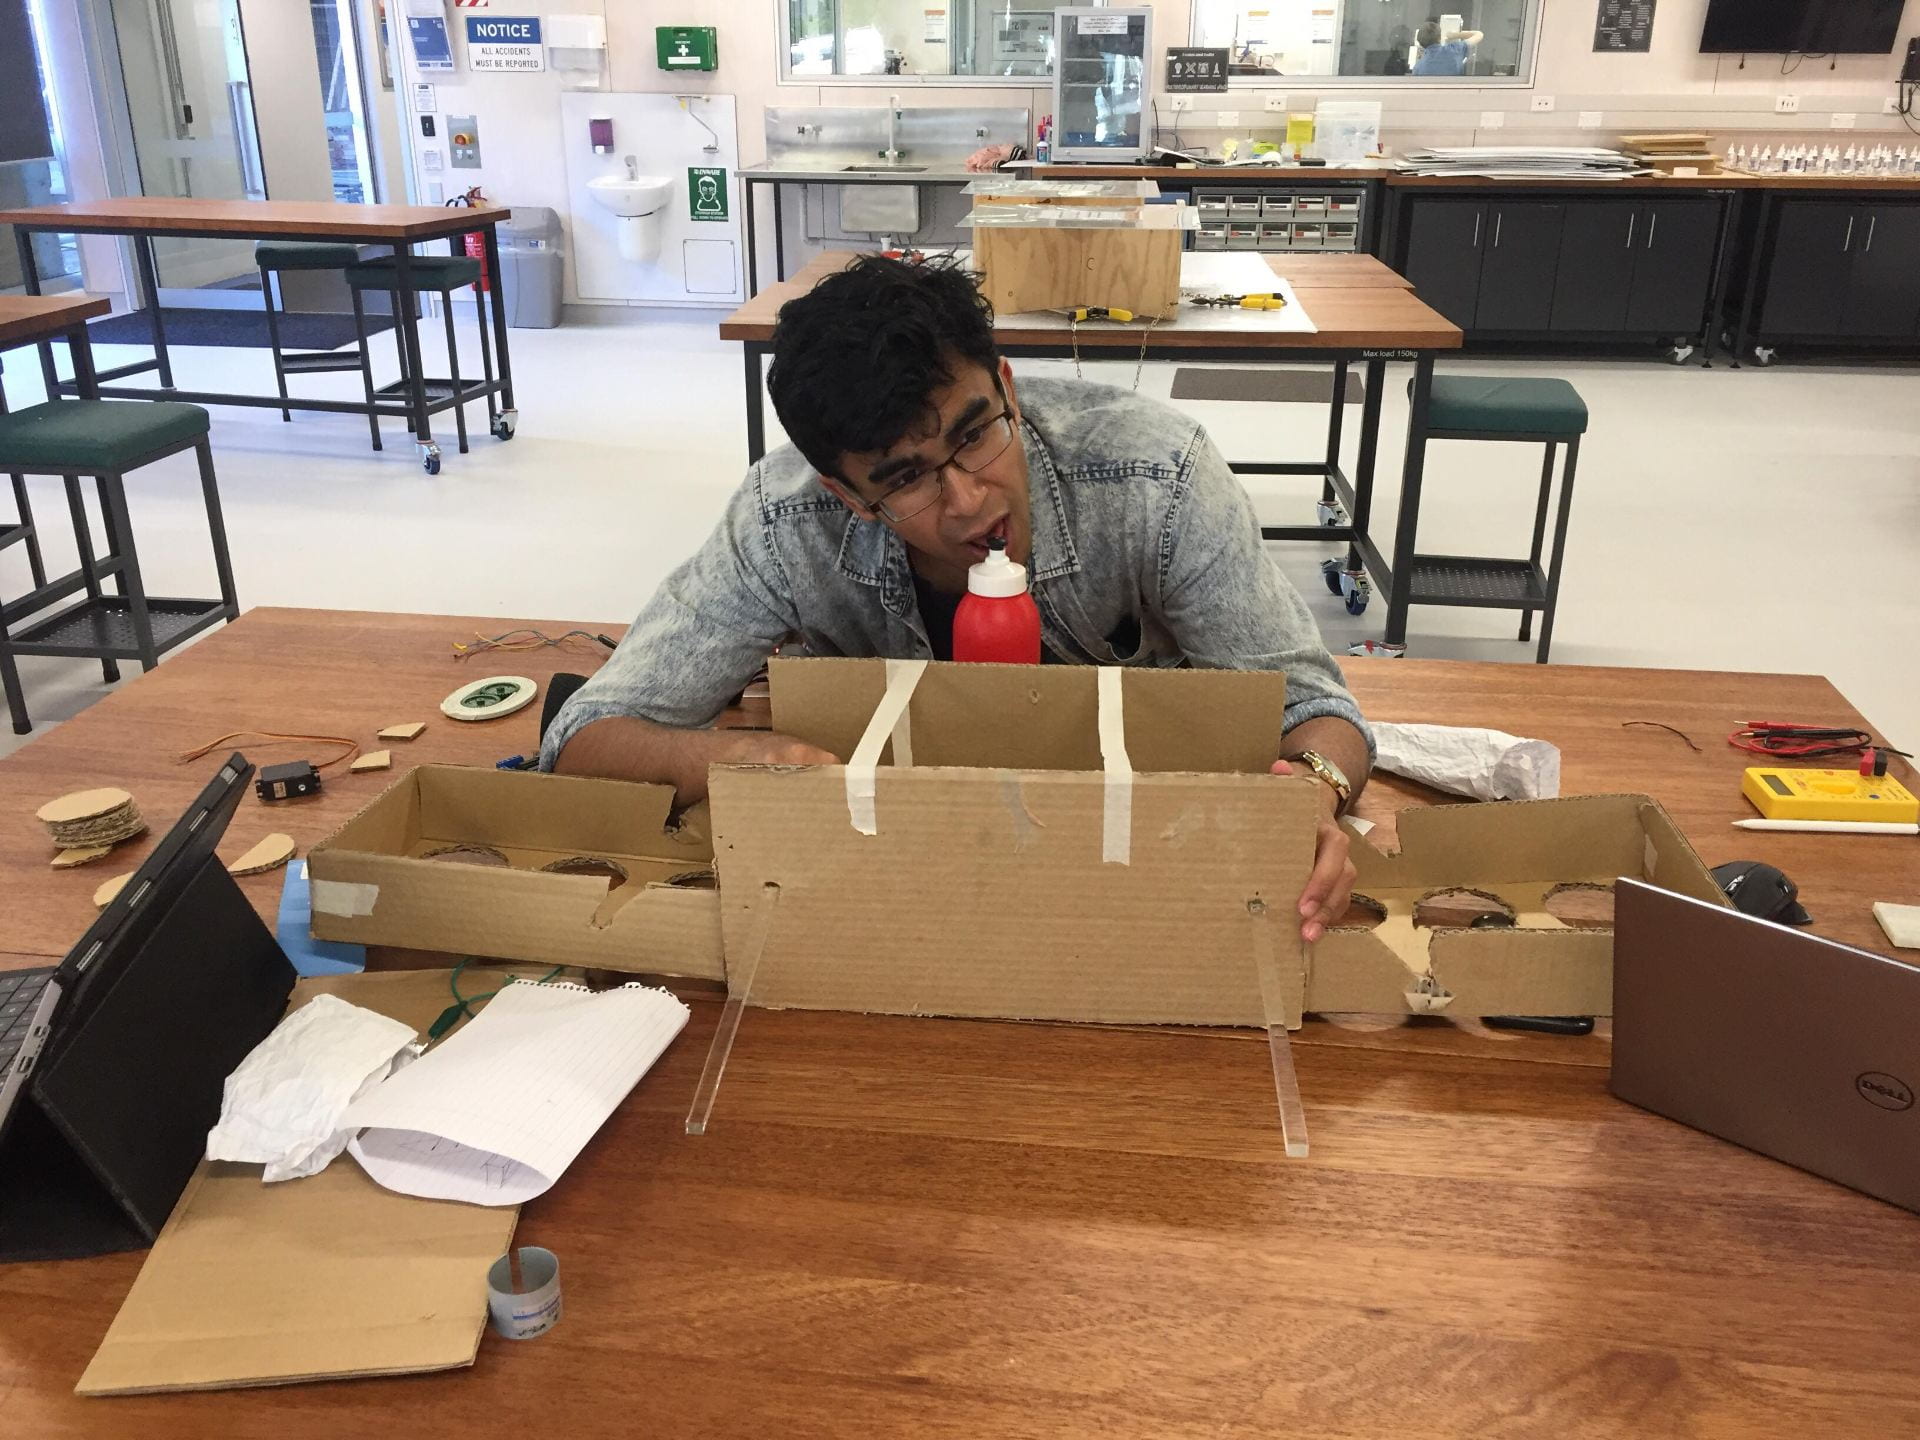
A cardboard prototype and a shitty warman robot - With your team, you brainstorm solutions to the task, make design decisions, calculate, analyse, and verify your design, and then produce a report outlining the design process. Pretty nifty looking back on it, but since this was the first proper design project, I had no idea what to do (I do now, please have a look at section 3 xx)
- The cool thing about this one is that you can go on to build your design with your group of four! This means that the following Window Washer project is done as a group of four while you sort out how to build a robot!
- 235 Window Washer
- This project is repeated every year. Ask any mechanical student and they will physically cringe at the mention of it. In teams of two (or four if you’re building your Warman robot), you are tasked with designing the power transmission system of a high-rise window washer system. You know, the ones which have pulleys to move the washing cradle up and down? Yeah, that’s the one.
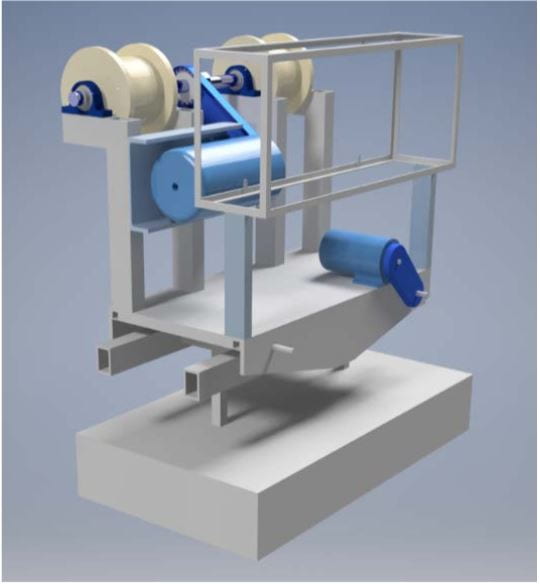
- You will choose motors, belt/gear/chains to transmit power, bearings, lubrication, adequate covering, design a shaft (I shit you not you will spend twelve days of your life desi
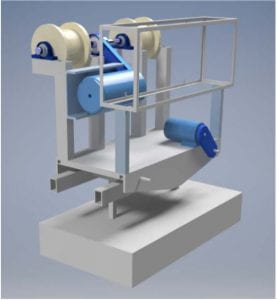
Our Window Washer Transmission System! gning a metal pole), keys, couplings, taperlock bushings, and the overall layout of the power system. THEN, make the major parts on CAD and produce a technical report detailing the design.
- Our tutor said he designed his transmission system in four hours. But since this will be the first time you’ll dive into catalogues to select transmission components, it WILL take six weeks for you. Looking back on it, a team of four students who’ve climbed the steep learning curve would take maybe two weeks to sort out the design. Give us a few more of these, we’ll be down to four hours in three-four years! (yay)
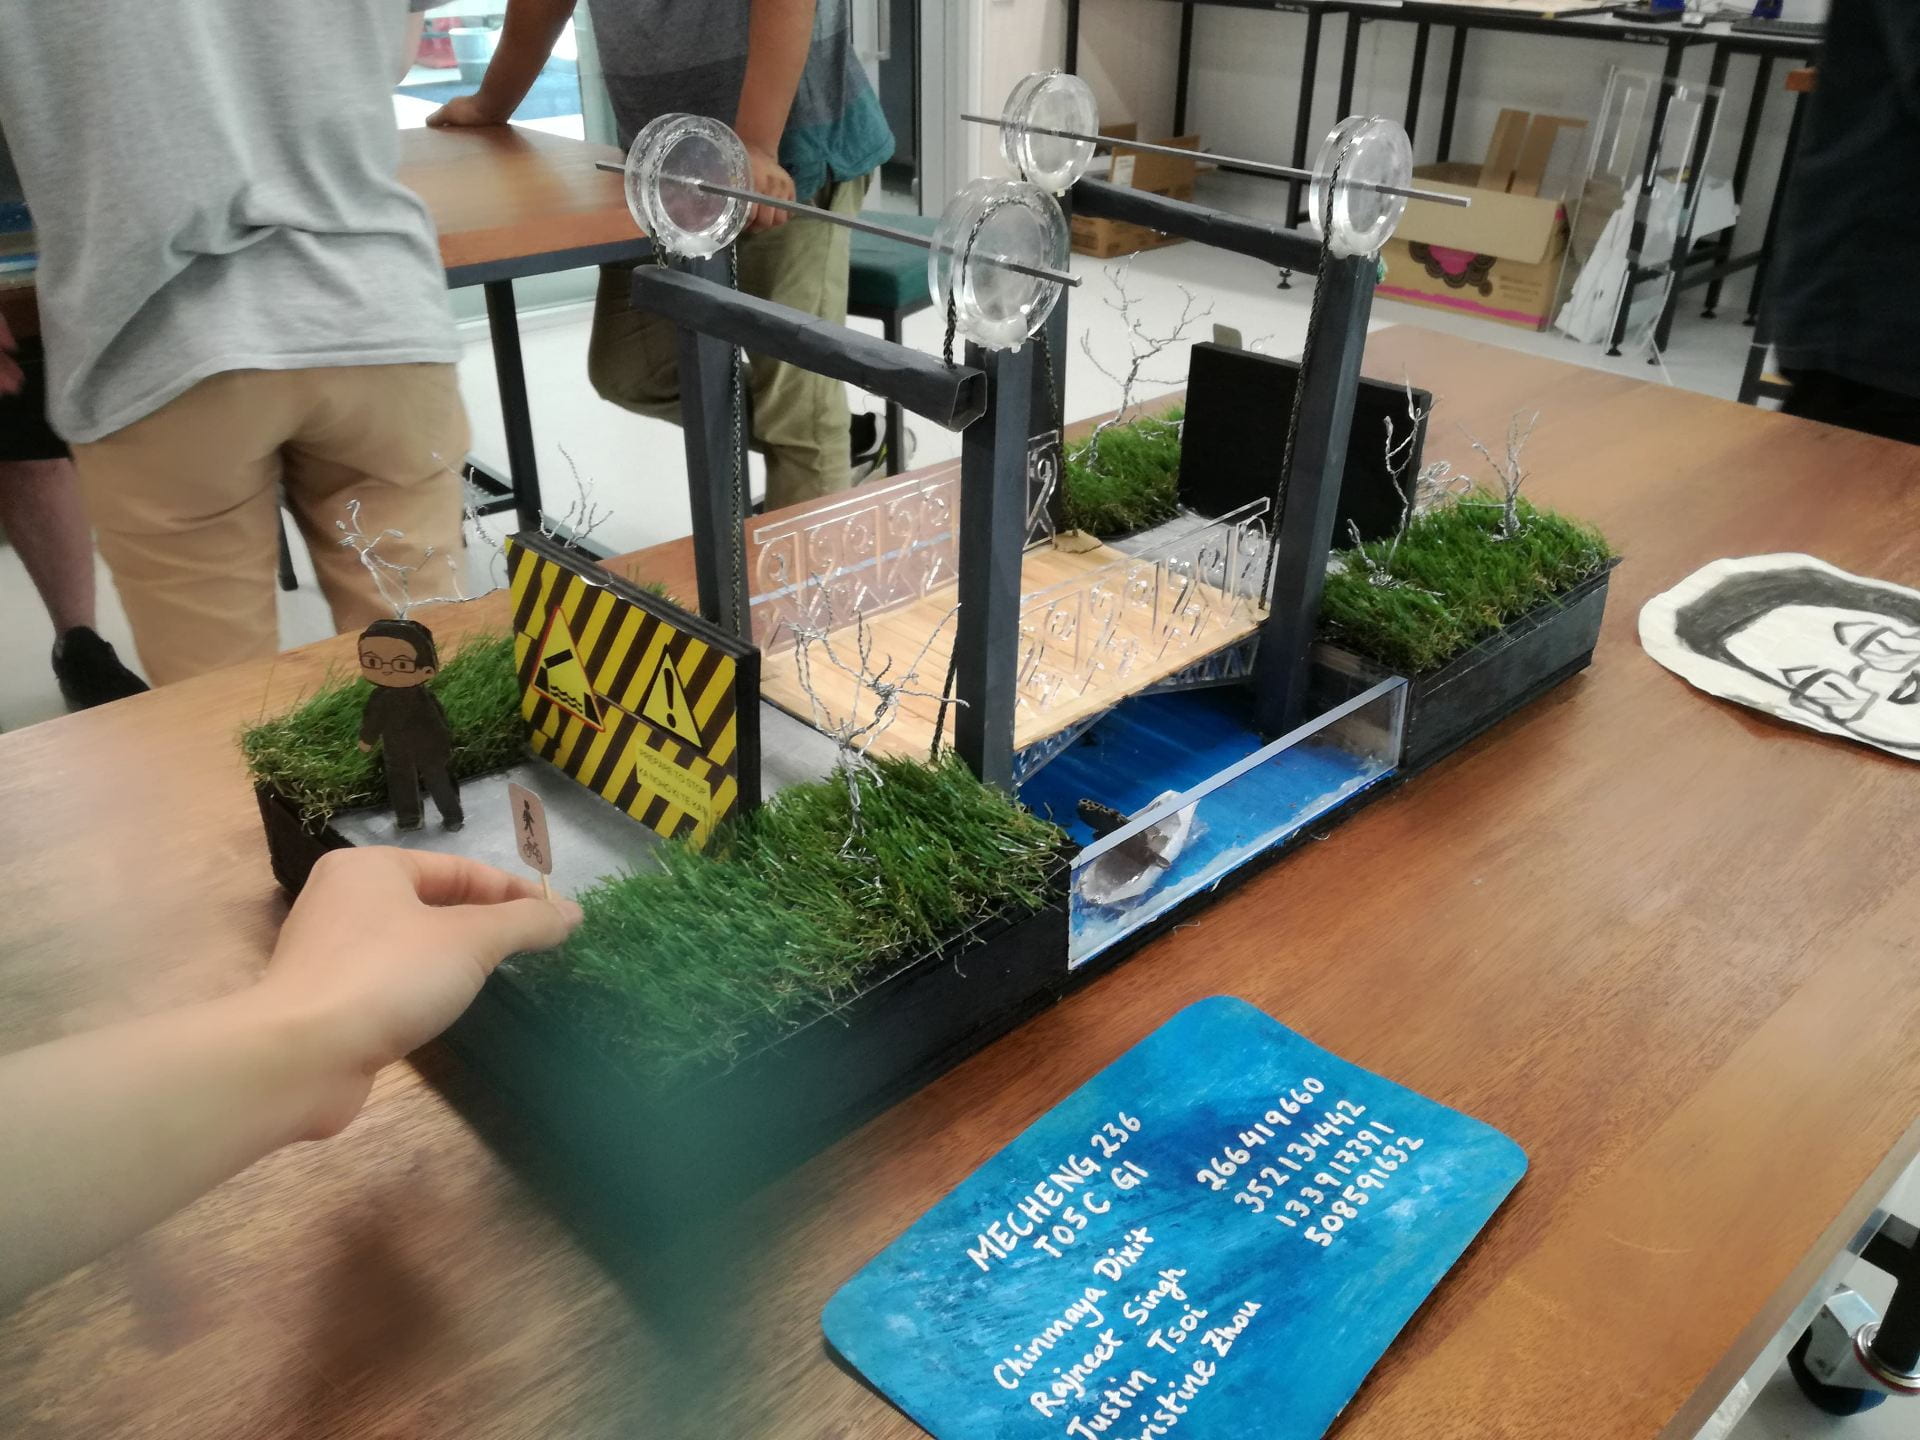
- 236 Bridge Design Project
- Another yearly-repeating project, this whopper TWELVE WEEK project is worth 43% of your final grade. It’s a big ‘un.
- You need to design a bridge in rural NZ. This bridge needs to be movable to let boats pass underneath. But since we’re talking RURAL New Zealand, there’s no power. So we design a power transmission system right from the energy source.

how many hazims can you spot? - Also, if there is a power failure, there should be a method to lift the bridge without electricity.
- This whopper of a project has the works, combining everything you’ve learnt from Warman and Window Washer together. Starting from scratch, we’re talking creating a Product Design Specification, concept design, detailed design, power transmission calculations, weather-resistance ideas, CA

I spent more time on choosing a font than necessary D models, client meetings, and a PHYSICAL MODEL of your bridge demonstrating how it works to clients. All pretty fun considering the wealth of knowledge gained from Warman and Window Washer!
- 204 Group Research Project
- This one is for every specialisation and is a five-week project with the largest team to date: 10 students!
- This is a research project where you produce an 11-page report detailing a particular issue, implementation, and recommendations. The idea is to coordinate with all your group members, delegate tasks out, spread the workload evenly, and produce a snazzy, well-formatted report with all the bells and whistles of professional documentation.
- I did enjoy this one, especially since my group was fairly on to it. If you know how to use words and research, this project is pretty straight-forward.
- 201 VEX Project
- In groups of two, you code a VEX robot to navigate a competition track. This is a great introduction to robotics, control systems, and writing elegant code. The scale of this project was about four weeks, and you learn a lot about implementing code in real-life! Read Section 2 for more information about the software we use.
- 201 Smart Home Project
- Another two-person job: you design smart-home features (things like automatic lighting, temperature regulators, security systems etc).
- This project involves implementing the electronic components you learn about in the course into an integrated system. You also code a virtual Arduino to illustrate one of your circuits. This one is pretty nifty, and is a great way to use the components learned in class like Zener Diodes, non-inverting op-amps, and linear actuators.

SECTION 2: TOOLS USED IN PART 2
On top of this, here are the programs/software/tools that I used throughout the year include:
- Autodesk Inventor (Design Papers): highly recommend getting good at this one – not only do you feel like a boss when you make some sexy CAD, Inventor is actually a powerful tool to illustrate your ideas (hugely beneficial)!
- MATLAB (Maths, Dynamics): Classic program that is used throughout most specialisations. Although we may not use it as much as EngSci and all the coding specs, mechanical engineers utilise a lot of the vectorisation and simplicity of the program. We don’t do anything crazy like stitch photos together, but it is helpful to know how to make your code fast and furious.
- ROBOTC (Mechatronics Course): This is our coding environment for our pet Vex robot! The language is C (I love you Paul Denny), with some additional commands for physical programs. In addition, it has a VIRTUAL ENVIRONMENT for you to test your code on your pet robot and play around with it. It’s real cute, and I genuinely felt like I was playing with a dog when I was coding my little baby <3
- TinkerCAD (Mechatronics Course): This online program allows you to code a virtual Arduino microcontroller for your second Mechatronics project. This is kinda fun, and the project allows you to go as in-depth as you want when you’re creating your program. I really liked having exposure to this one – a lot of mechanical engineers want an Arduino to play around with over summer!
- Simulink (Dynamics): Now this one is pretty new and slick. It’s an extension on MATLAB that is uber-powerful for mechanical engineers and the physical systems we deal with. A project we completed recently was about analysing a spring-damper system for a mineral-processing machine. If you crack open your Math workbook, you may remember you can solve these equations using ODES. BUT in our case, the mass is not constant :0 so you have to do some nifty Simulink block
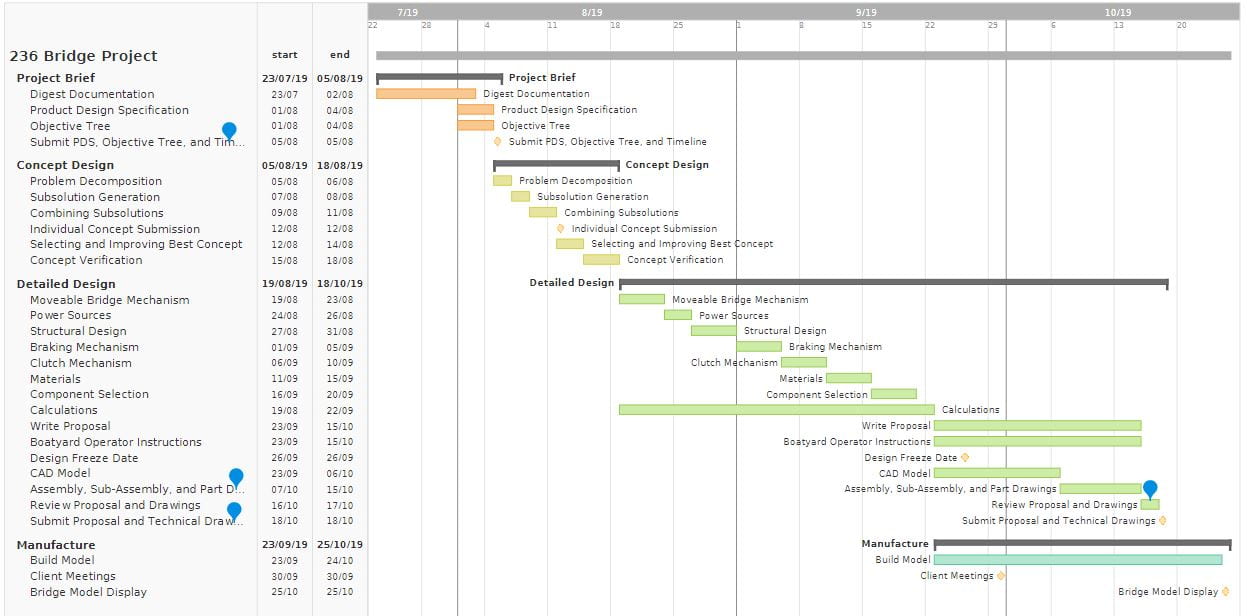
Our Bridge Project Gantt Chart diagrams to solve your equation. This one’s an ultra-powerful program, and I have a feeling I’ll be using this a lot in the coming years!
- Gantt Charts (Management, Design): We make a LOT of Gantt charts in second year. They are actually very handy to understand the scope and duration of your project, so please don’t scoff when you see the mech students huddled around a Gantt Chart. (HINT: I would recommend this program to make your gantt charts, they look pretty nifty!)
- MS Word/Powerpoint/Excel/Word Online (Design, Management): Hazim actually does a little spiel about how to use Word in 201, and it blew my mind! Word is so much more powerful than most people realise, and it’s really nice to use it to (half) its potential in Part 2. In addition, you get a look into constructing proper presentation slides on Powerpoint, and the smart students use Excel to iterate when designs hit the fan. There is a lot of collaboration in second-year, so I used Word Online a lot to format reports, collaborate with my team-mates, and produce some aesthetic and functional technical pieces. Highly recommend getting an understanding of this!
- RStudio: Although EngSci uses RStudio way more than us, it’s good that we get exposure to some data analysis languages in Part 2 too! This program can be modified to do a lot of wacky optimisation and analysis things (if you want to know more please visit Michael over at the EngSci nerd camp, he absolutely nuts over R)
- WileyPlus/Chegg xx: WileyPlus is an online extension of Dynamics that gives you a weekly assignment of questions. This is what we compete over in Clan Wars, and some of us (obviously not me or Vanessa) quickly have a look at Chegg to get a headstart to some of the problems. #AcademicIntegritybaby
- TEXTBOOKS (For Dynamics & Thermofluids): Understandably, the big theory papers of Part 2 utilise textbooks a lot. From looking up characteristics of Refrigerant-134 at room temperature and 1atm, to supplementary readings, to getting essential coefficients, be prepared to turn to your textbook multiple times over semester.
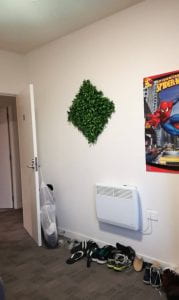
When we were shopping for material for our bridge project, we came across some leafy mats. Impulse buying is fun - Google Drive/Docs/Sheets: Like I said about Word Online, Google has useful platforms to collaborate and communicate. It stores all your necessary documents in shared drives and such, so is very essential to keep your numerous group projects chugging along!
- Personal Diary/Schedule Book: I like to use my scheduler to keep up to date with what needs to be done each day. Just a personal thing that works for me, but feel free to try this out if you want a new system to be productive. I also note down where my time goes every day in my Diary. For example, today I spent two hours watching Sicario on Netflix, four hours at lectures, 1 hour at Countdown, three hours procrastinating (excluding the movie), and four hours of actual work. It’s honestly not a lot of work, but knowing I haven’t done enough today makes me work harder tomorrow!
- Bunnings: I absolutely adore Bunnings. It is a highly under-rated theme park for Engineers. Embrace the stereotype and make cool DIY projects in your spare-time! #feelsgoodman. Recently, I made a wall-hanging from artificial turf that adds some green to my room!

SECTION 3: HOW TO WIN FRIENDS AND INFLUENCE GROUP MEMBERS
Alright, here it is, my magnum opus. Here is everything I learnt about how to make group projects an enjoyable, collaborative, and productive ride!
- Hopefully, you’ll get some great group members like I did this year. Honestly this is probably the biggest thing with University group projects. The better your group is, the more enjoyable your experience will be. SO, try to choose good team members. (If you do end up with drop-kicks, don’t be afraid to crack the whip tho)
- The second big thing to focus on is to meet with your group REGULARLY. This means either scheduling a weekly, daily, hourly meeting just to come together. You may not get a lot done during these meetings, but the more you see your group, the more collaborative the project becomes.
- The third thing is to to not get attached to ideas. This clouds your logical decision-making, which is your MOST important faculty in group projects. You have to think about the good of the design, so focus on getting the logic of your solution right. Once you know your constraints, brainstorm with your team, verify that the idea you all gravitate to works, and then go from there. Don’t marry your first idea. xx
- Expect your teammates to pull their weight. This is a hard one for me, I quite like to be involved in every part of the design, but that is physically not possible with such large projects. You have to be ready to delegate tasks out, trust that it will be done correctly, provide suggestions, but don’t try to do all the work. Trust the process. Trust the team.
- Also, plan appropriately. Have a strategy in terms of when things should be done by, and try to stick to it. A mantra I used in Semester 1 (when we had several group projects at once) was to do one small thing for each project every day. Just one small thing. Get it done, then move on to the pressing stuff. This keeps group projects chugging along!
- Finally, have fun. Group projects are supposed to be enjoyable, collaborative, and are supposed to be extremely difficult. That’s how we grow as engineers. We all grow together. Looking back on this year, my brain has done some serious mental exercise this year. It’s all about the journey as you and your team members fail, fail, fail over and over again. Eventually, things start to make sense. So trust the process, and try to make the projects fun! They’re supposed to be xx
Okay, I think this is more than enough for now. There’s a lot of content in this post so thank you if you’ve made it this far! Stay tuned for the final edition of my blog (once exams are out of the way!)
Hope you are all enjoying the weather xx